Setting Up a Cabled Tethered Workstation
Where you want it, when you need it
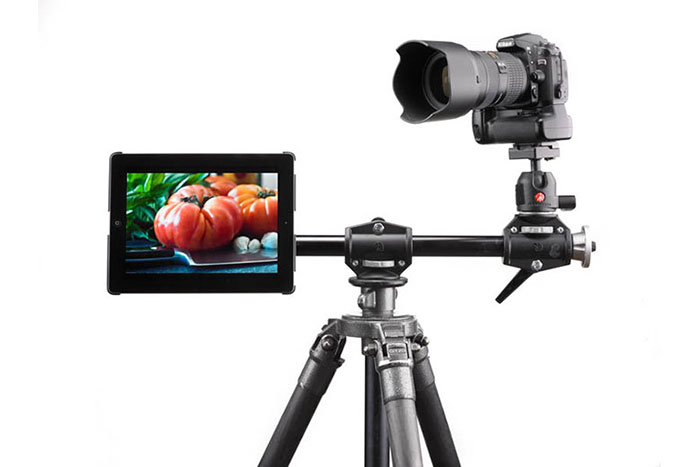
It’s easy to create a streamlined tethered setup that can be customized to the way you like to work. Whether you want to transfer your images to a desktop, laptop or tablet; whether shooting on tripod or handheld; in studio or on location; whether just for you or for sharing images with assistants, subjects and clients; you can configure a comfortable and secure workstation that meets all of your needs.
Here are a few common set ups that work well for the majority of photo shoot scenarios. Don’t let these limit your imagination. Whatever your shooting situation, you can find mounting solutions that will help you tether easily and efficiently.
Sample Setup
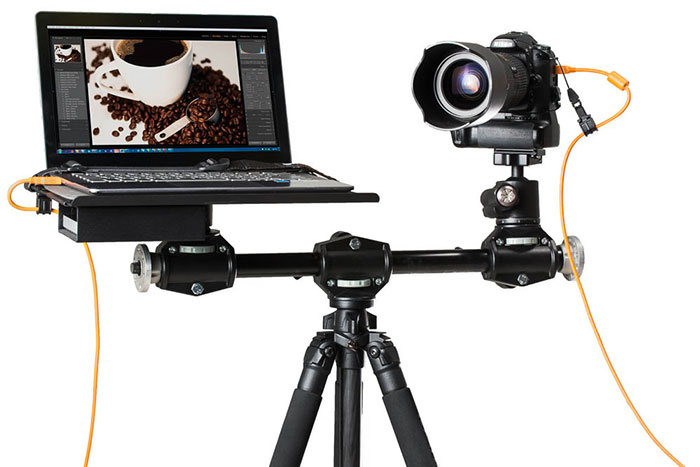
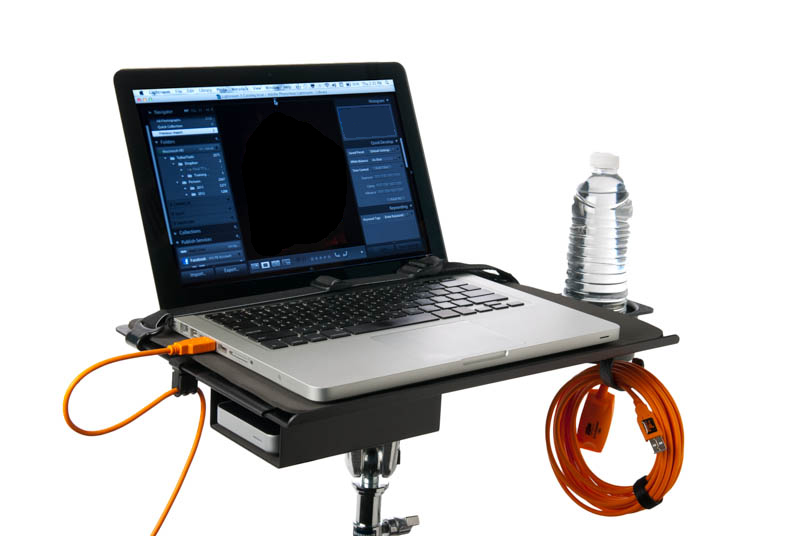
The most common tethered workflow involves shooting directly into a laptop computer. The first thing you’ll want to determine for your workstation is how you’ll secure your computer and camera so it is convenient to your subject and keeps your gear secure. Setting up your workstation properly will help you achieve efficiencies such as easy viewing and communication with clients, powering all of your equipment and instantly backing up your images. The Tether Table Aero System from Tether Tools is designed to give photographers options for creating a portable workstation that is as functional on a location shoot as it for daily use in a studio.1

First select the stand you’d like to mount your laptop on. A tripod or lightstand is the most common option. Rolling wheels on either offer added mobility
a. 1a. If using a crossbar (such as the Manfrotto 131 DDB Crossbar) to mount the laptop and camera, attach the cross bar to the top of the tripod.
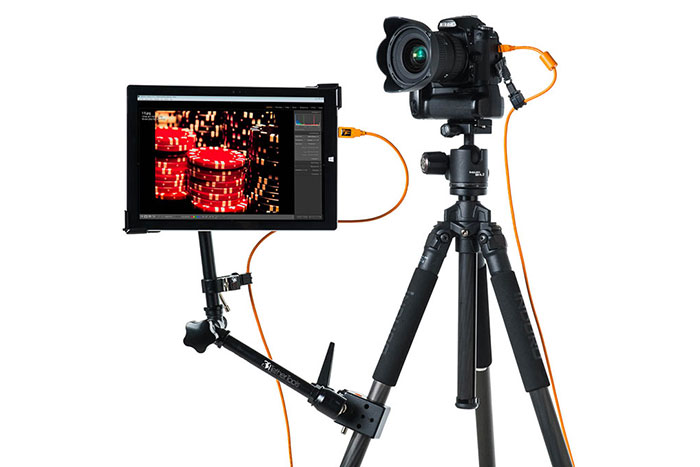
b. 1b. If you are attaching an arm & clamp to a stand (such as the Tether Tools Baby Side Arm Kit), attach that securely at this time.
2
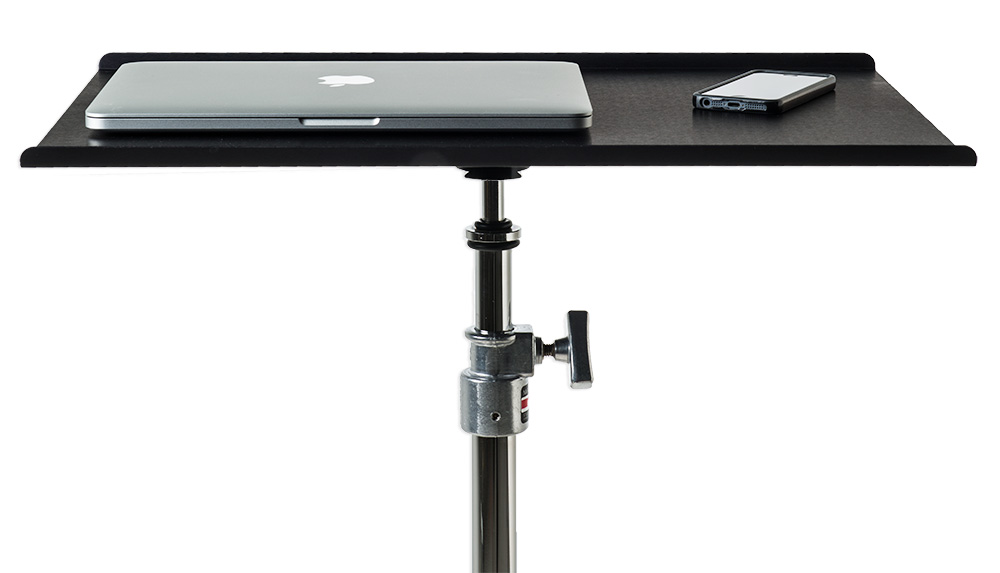
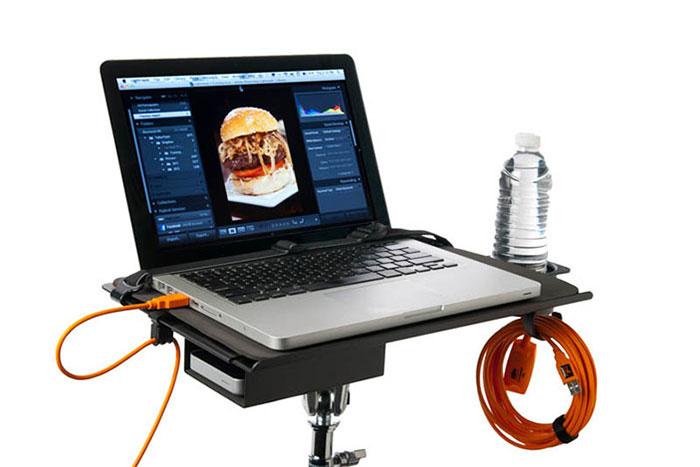
Be sure to select a Tether Table with enough workspace for your needs. Options range from streamlined tables with just enough room for the laptop, to the largest 22”x16” Master Table with enough room for both computer and camera, shot list, lenses or other gear.
3
Secure the Tether Table to the stand of choice. The LAJO-4 Pro-Bracket mounted under each Tether Table has four receptors so the table can be mounted to any tripod, light stand, ball head, cross bar, or a side-arm & clamp configuration coming off the column of your stand.
4
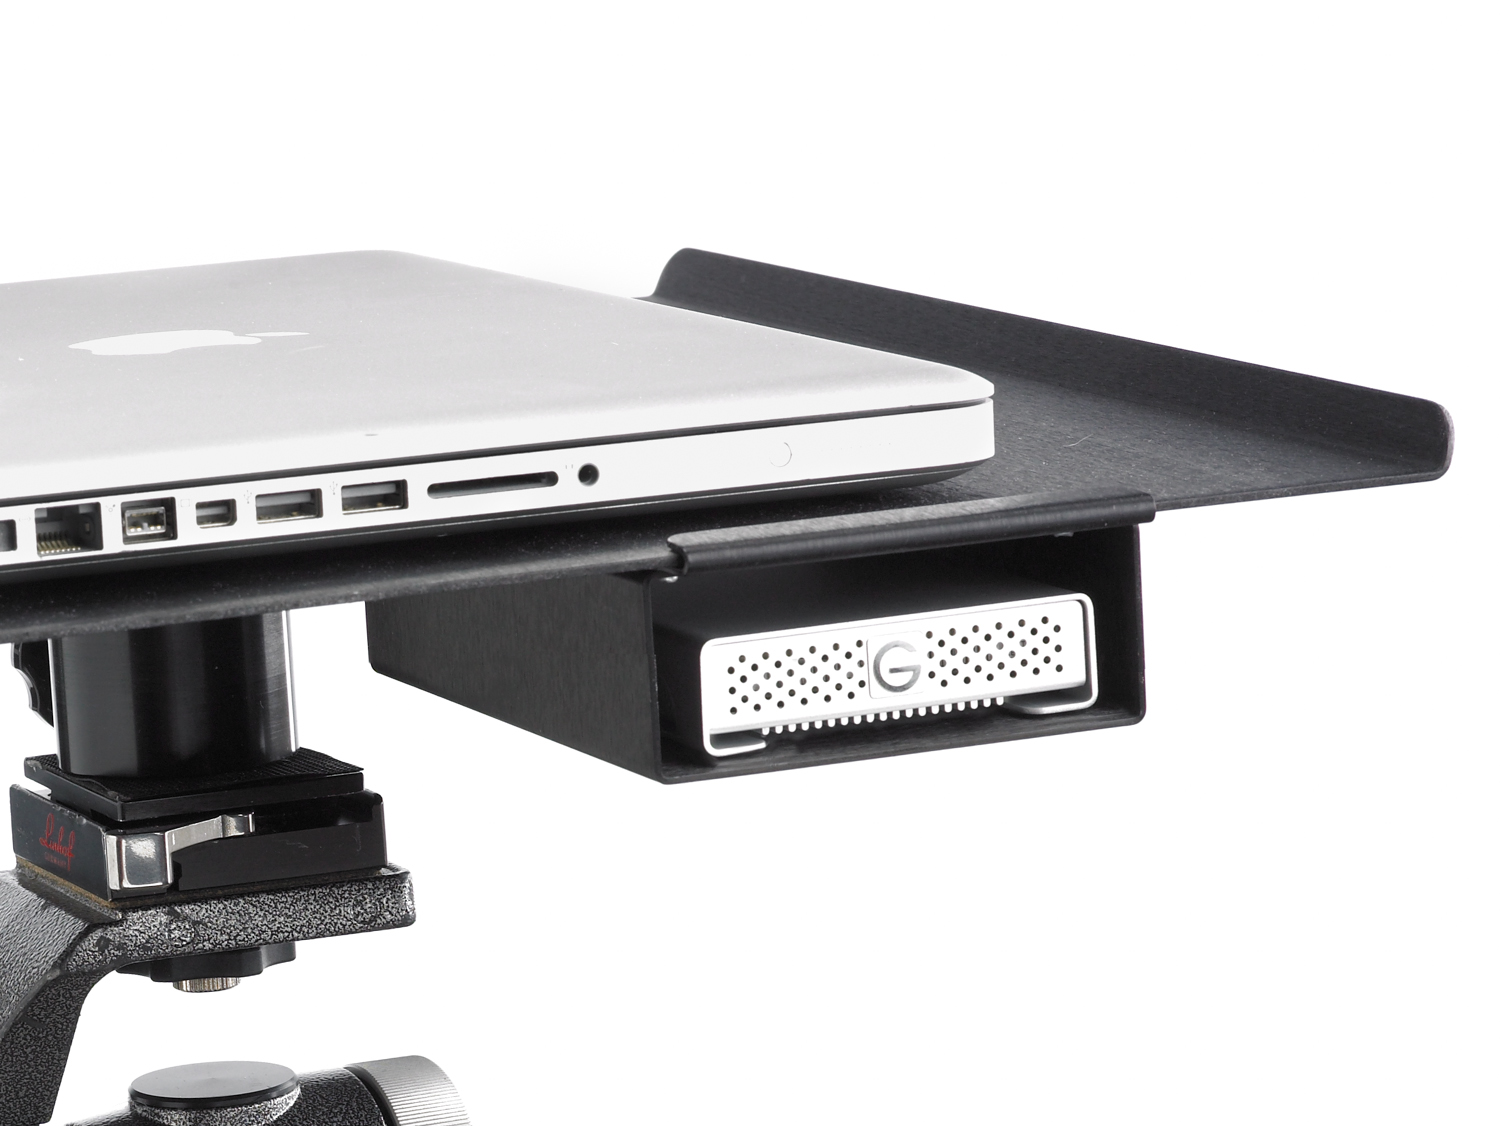
If you are backing up images to a hard drive during your shoot (recommended) be sure to attach the External Drive Compartment (solo or duo) to the Tether Table first.
5
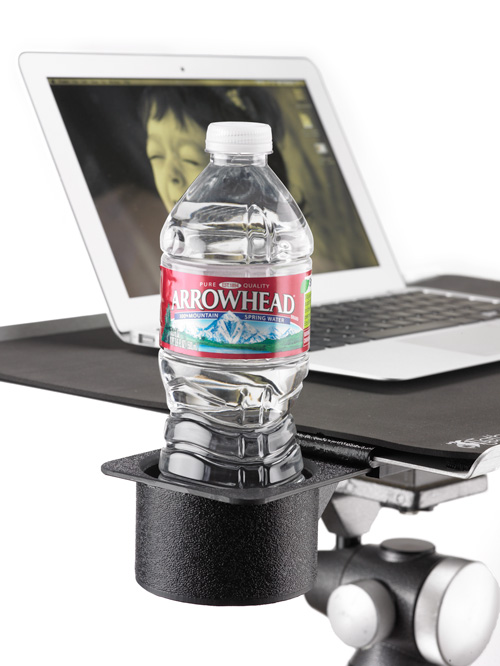
Slide the Aero CupHolder onto the side lip of the Tether Table. The cup holder is nice to have for beverages, but is also ideal for holding light meters, triggers and small accessories nearby.
6
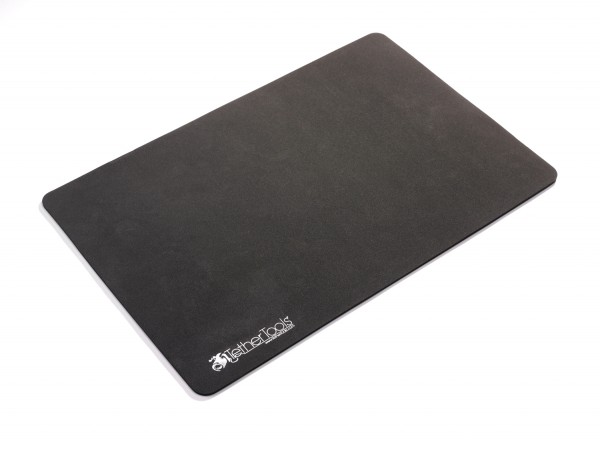
Next place the non-slip Aero ProPad on top of the Tether Table. The ProPad has heat dispersing properties to keep the computer from heating up the table during extended use. It also keeps lenses and accessories from scratching the table.
7
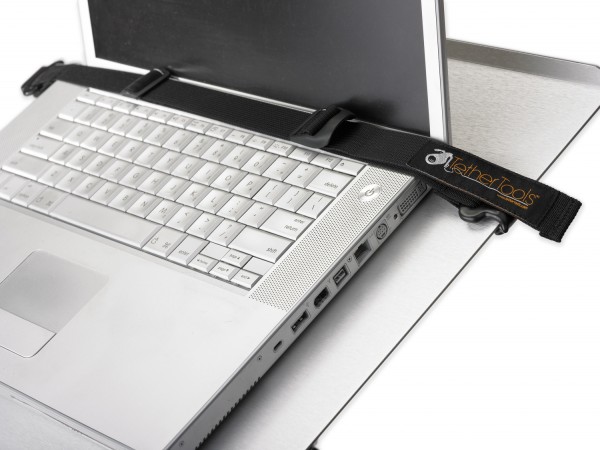
Place the laptop computer on top of the Tether Table and clip the Secure Strap to each side of the table. This is the most important step to ensuring your computer is securely attached to the Tether Table in the event someone should bump into your computer or stand.
8
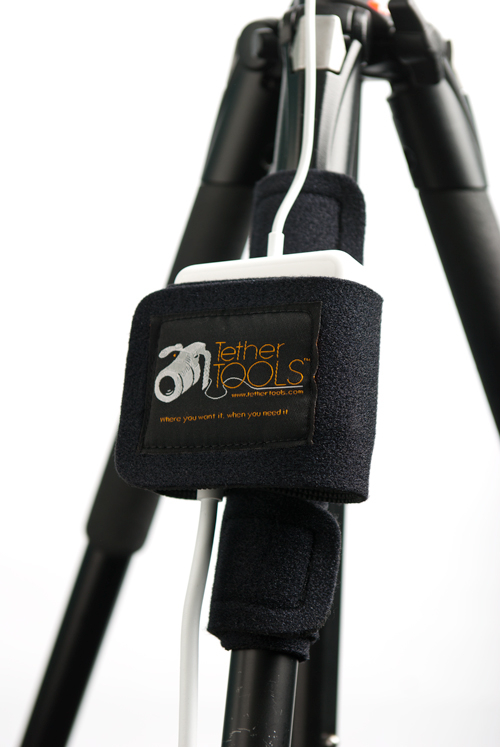
Attach a StrapMoore to the leg or column of your stand. The StrapMoore holds your laptop power brick so it doesn’t dangle from the laptop, causing strain on the AC power port. Wrap the elastic straps around the leg to secure the StrapMoore to the stand, then use the open straps to wrap around your battery brick. This tool can be used for holding many different accessories.
9
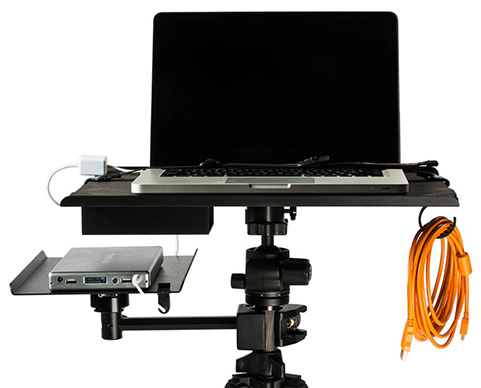
If you plan to shoot for long time periods of time and will not be near a power source, plan to bring a back-up battery for both your camera and laptop. The Tether Tools’ Utility Tray Kit can be mounted on a stand just under your Tether Table to hold the laptop back-up battery.
10
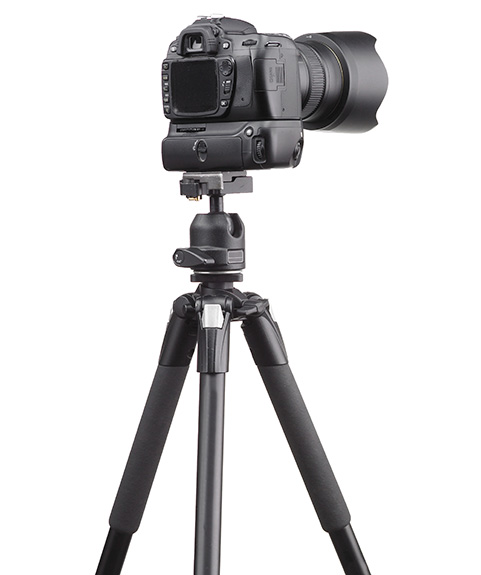
Mount your camera on a tripod or place it securely nearby your Tether Table Aero Workstation.
11
Start your laptop and start up the software of choice.
12
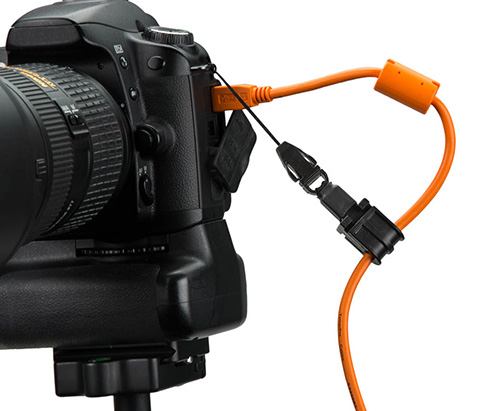
Connect your compatible tethering cable from the camera to the Computer. Attach JerkStoppers at both the Camera and Computer Ports. Let your cable dangle to the floor. Depending on the length of your cable, you may want to coil up your cable and hang it on the Aero Hooks, which can be attached to the edge of the Tether Table. This will keep your cables up and out of the way on a tight set up. If you are shooting handheld and need longer than the 15ft base cable, connect your Active Extension cable and/or TetherBoost Core Controller at this time. Secure any in-line connections with an In-Line JerkStopper
13
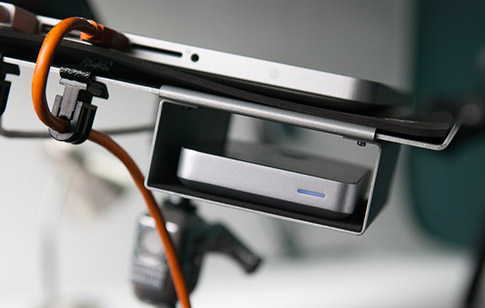
If you are backing up to hard drives, connect a cable from the computer to the hard drive of choice (usually USB or Thunderbolt) at this time. Set up your hard drive to back up your images.
14

You are now ready to start your tethered session.
Packing Up
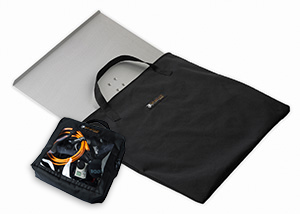 If shooting on location, when you are ready to pack up your gear, simply slide the cup holder under the table, remove the power brick from the Strapmoore and detach the Utility Tray Kit from the stand. Once removed from the stand, all of the Tether Table Accessories will pack back into the Tether Table case securely so you’ll be ready for the next shoot. To best protect cables, properly coil them and secure them with a cable tie. The JerkStopper Pro Tab cable tie secures to the cable so it is in the same place each time when ready to repack. Securing cables, extenders, TetherBoost and JerkStoppers in a small Cable Organization Case with a window ensures your essential tethering gear is all together and secure the next time you want to use it.
Learn More About Configuring a Workstation
If shooting on location, when you are ready to pack up your gear, simply slide the cup holder under the table, remove the power brick from the Strapmoore and detach the Utility Tray Kit from the stand. Once removed from the stand, all of the Tether Table Accessories will pack back into the Tether Table case securely so you’ll be ready for the next shoot. To best protect cables, properly coil them and secure them with a cable tie. The JerkStopper Pro Tab cable tie secures to the cable so it is in the same place each time when ready to repack. Securing cables, extenders, TetherBoost and JerkStoppers in a small Cable Organization Case with a window ensures your essential tethering gear is all together and secure the next time you want to use it.
Learn More About Configuring a Workstation