As a photographer, a relatable experience is taking a photo, looking through the camera viewport and then thinking you managed to gain the perfect shot. It’s a great feeling. However, during editing/post-processing, you come to realize that the image is slightly out of focus, the subject has a wrinkle in their clothing, or a similar issue adds hours to your post processing workflow. Cue the not-so-great feeling.
Whether you’re using a DSLR or mirrorless camera, tethering helps you get the perfect photo in fewer shots. Viewing images on a larger screen is a great way for you, your clients and your subjects to spot issues with focus, lighting, posing or composition. You’ll spend less time editing and your clients can let you know the moment you’ve captured the shot they are looking for. Peter Hurley refers to his tethered photography setup as, “My number one coaching tool. It makes my job so much easier because humans have the ability to learn and look at themselves and get better.”
Recently, Glazer’s Camera and Tether Tools held a live webinar regarding a photographer’s journey to an improved workflow, allowing you to become a more professional photographer. Let’s go over the key points that were brought up during this presentation.
Plan Your Tethered Workflow
Before you get started, take a moment to lay the foundation by planning what workflow works best—whether you’re in studio or on-location. Not all photoshoots are created equal. Photographers that set up no workflow will ultimately end up with duplicate or unusable image files which take up hard drive space, result in lost files and more time spent in post. The right tethering software is also a key part of any tethered workflow. Good software results in an organized workflow, allowing photographers to quickly view, edit and organize image files. This eliminates additional stress from not being able to find images when faced with quick turnarounds and client deadlines. Visit our tethering software page to find available tethering software options by camera and operating system. Aside from having the right workflow and software, it’s imperative to have all the equipment you’ll need to make this a successful photoshoot for your photography style and needs. Let’s go over the different setups to take into consideration when maximizing your workflow.
In The Photography Studio
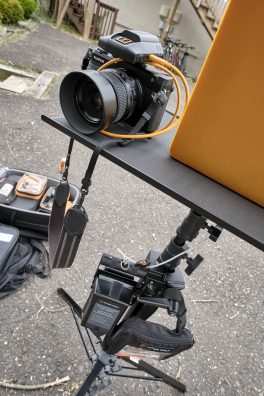
In a studio or more controlled environment where the camera and computer will not move much, an optimal setup is shooting with the laptop on a Tether Table Aero using a wired connection like the TetherPro Cable. This way, the computer can be anywhere that’s easily accessible for the client to view the images, which will transfer directly from camera to the computer quickly and efficiently. This setup is ideal for those who work in photography studios where lighting and backdrops are constantly changing with each studio session. The Tether Table Aero is portable and is mountable to just about any tripod, creating a stable tethering surface. With the addition of the TetherPro cable, there is almost no delay between image transfer and image files on screen.
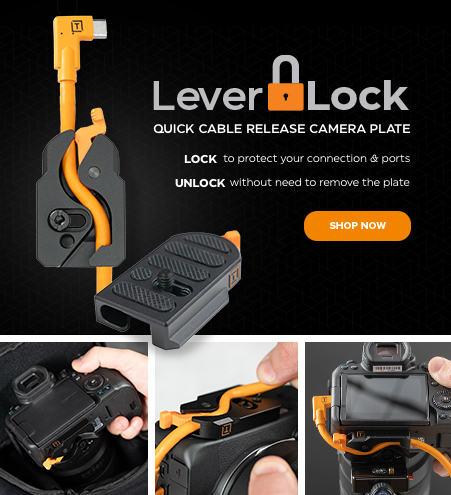
One challenge when setting up a wired connection is ensuring the cable stays in place. There are many instances where the cable can be get yanked out of the camera port easily or loosen just enough to break the physical connection, causing the software you have to lose camera connection; worst case scenario, the cable port becomes damaged resulting in a cancelled photography shoot and costly repair. Fortunately, there are several tools that can help, such as the JerkStopper and TetherBlock. These solutions can help minimize the movement of the cord and can prevent it from inadvertently coming unplugged.
Out of the Studio
If you shoot on location or can’t be bothered with a cable limiting your movement, wireless tethering is an option you may want to explore. The Air Direct Wireless Tethering System has made quite the splash with photographers and opened workflows not previously possible with traditional tethered photography.
The Air Direct Wireless Tethering System now gives the freedom of movement to photographers while still enabling them to connect their camera to a computer or mobile device for both image review and camera control. Using Air Direct, you still retain the ability to use the tethering software of your choosing compromising on nothing in the way of features. The ability to have the same features and workflow is great for photographers who may like to use traditional cabled tethering as well as wireless tethering for different shooting conditions or requirements.
Once you’ve made the connection from your camera to your computer, it helps to think of how your workspace and viewing station will be accessed and powered. Tether Tools ONsite Power Management and computer/tablet mounting solutions help create the perfect shooting and viewing environment on-location anywhere in the world. Today’s technology has come a long way. Photographers are now able to get long lasting power from D-Tap batteries that can power laptops, cameras, accessories and serve to quickly charge equipment when outlets are inconvenient or unavailable.
It’s important to remember that wireless tethering might make sense in some situations and cabled tethering might make sense in others. Regardless of the setup, learning how to show the best images cuts down on the number of shots you’ll need to edit and saves you tons of time in the long run. The key to setting up a good workflow is thinking about it, planning it, then getting the tools you need to do it right. And just because it works, doesn’t mean there isn’t room for improvement. Be open to see how other people manage their workflow but ultimately strive to create a system you can understand and put into production.
Want to watch the whole presentation? Watch here.
New to tethering and want to learn more? Visit our “Tethered Photography Basics” article to learn more.