This post was written by Torsten Kieslich featuring model Titania Lyn.

© Faces of Vegas / model: Titania Lyn
My Story & Why I Love Tethering
I have to admit that I entered the world of tethered photography pretty late. Although shooting for quite a while, I always relied on the screen on the back of my camera and more often than not found myself surprised when I later opened my shots on my Mac.
But being tied to some cable didn’t appeal to me too much those days – wouldn’t it just force me to stand in one spot, not being able to move around as I’ve been used to? And where to put the laptop? Wouldn’t the cable just come off and ruin the shot or even damage my camera or laptop?
Then, I saw Dutch pro photographer Frank Doorhof using his camera tethered and was sold to the idea immediately. He was doing everything I’ve been worried about: he changed his position, walked around in the studio, and still could immediately judge every shot on a nice big laptop screen.
The cable did not get ripped out of its socket and I did not see him restricted by it in any way. Also the difference between a photo appearing on a 15-inch laptop screen (preferably calibrated) and the tiny 2.5- to 3-inch display on the camera is just stunning.
Even the 3-inch displays on your modern camera won’t show you too much and it’s not easy to see if you’ve nailed the shot the way you wanted. Let’s say you’re shooting with f2.8 or even higher. It might easily happen you miss that your focus just is not straight on the eye of your model but just a tiny fracture to the side. You would not see it on your camera display because the shot will still look tack sharp if you’re not chimping and zooming in on every image (which would completely ruin the workflow).
Your composition and colors can only be judged on that tiny screen and you have to wait until you’re back home to see if your shots really turned out the way you wanted. Shooting tethered not only allows you to judge your shot, but also gives you the opportunity to retake the shot while still on the set.

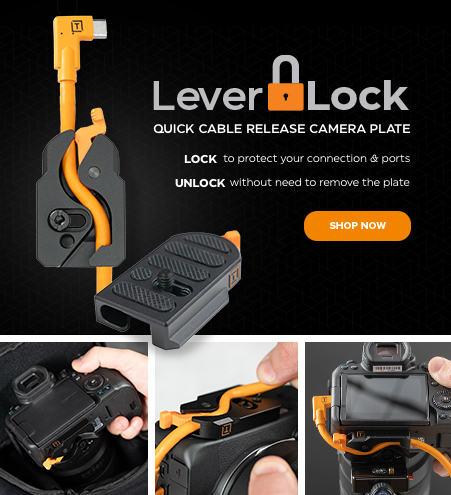
So I asked Frank, who sells Tether Tools equipment in Europe, what I’d need as a basic kit. I bought a Tether Table and some JerkStoppers as well as a nice long USB cable that I used with my D3 in the studio to shoot directly into Adobe Lightroom. The cable itself comes in a nice bright orange so it’s pretty hard to miss it and trip over it.
The table has its own bag and is easy to carry and set up, as it simply goes on my tripod instead of the camera. I’m not too much of a tripod shooter, anyway. And the JerkStoppers are really ingenious and prevent the cable from being pulled out should there be an accident.

Limitations
Lately, I have been using a D800 more and more and also did some outdoor sets. Here I found tethering to Lightroom 4 being a bit of a pain, as obviously Lightroom 4 tends to “forget” its connection to the D800 during shoots. I’ve seen this matter reported a few times in some forums and it seems likely that it’s a Lightroom problem, which is hopefully being addressed in Lightroom 5.
But what’s more problematic is that the Raw files coming in from the D800 are pretty huge and even with a USB 3.0 cable I found myself being three or four shots ahead of the laptop. Also it’s not always easy in bright sunlight to place the laptop in a way you can really see the screen properly.

© SanDisk
Wireless Tethered Photography
Although being happy with the cable, I started to look for other options to get everything a tad more comfortable. The first option promising a better solution is the Eye-Fi card, an SD card with embedded wireless capability. At about $80 to $90, it’s an affordable solution allowing you to bring your JPEGs on laptop or even an iPad. To get the shots into Lightroom you simply need to send the pictures to a watched folder.
As you’re no longer sending over Raw files, the transfer rate is quite fast and I don’t see the shots with a huge delay as I did when I was using the cable connection. Still the Eye-fi card has its drawbacks. In Germany it’s only available as an 8GB card, forcing me to store Raw files and JPEGs separately in the camera. My Raw files have to go on a CF card, while the JPEGs get stored on the Eye-Fi SD card.
To save the shots on my laptop I then need an external card reader instead of being able to use the Mac’s built-in SD card reader. While this is a good and affordable solution, even allowing me to use my iPad to check the incoming shots, it still feels incomplete to me.
My Set-Up
Then I came across the CamRanger. Now this thing is about the best solution for wireless tethered photography I can think of! It’s a small device in the $300 price range that hooks up to the USB port of your camera and creates its own wireless network. Now, wouldn’t the Eye-Fi card just provide the same solution? Not really, as the CamRanger not only transfers your shots but it also is able to take full remote control of your camera.
It comes with an iPad app and a little program for your Mac (still marked as beta but working quite well), not only utilizing live view to give you a preview of your shot – something you can’t do with the Eye-Fi – but also allowing you to simply tap on the screen to place your focus where you want it, to dial in aperture and shutter speed, and even take HDR or interval shots.
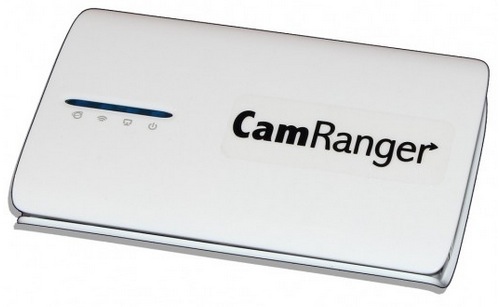
The CamRanger really caters all my photography needs. I can hook it up to any camera I like, put the camera in spots where I normally can’t adjust anything, and select anything comfortably from my iPad. Nicely enough this thing doesn’t drain the camera’s battery as it works with its own exchangeable power supply, lasting approximately 4 hours.
The beauty is that it’s not just a tethering solution, but it also allows me to compose and focus right on the big display of my laptop or iPad. And even the iPad delivers quite a huge preview compared to the tiny screen on the back of my camera. In bright sunlight I can simply move and turn the iPad until I can see everything properly. And it’s much more mobile than dragging around a laptop and tripod. You can find a detailed review of the CamRanger right here.

© Torsten Kieslich / model: Anabel Miramontes
The Options
So here we have three tethering solutions for three different situations. Of course there’s a different price range, too, starting from a $50 cable to an $80 Eye-Fi SD card and up to the $300 CamRanger.
I’m still using my cable in the studio, where I can set up my laptop to check on the shots easily and even allow the model a good look at the screen – something I found is appreciated very much.
For shots on location or outdoors I use the CamRanger with my iPad, which I find to be a pretty versatile solution. I can walk around with the iPad, hand it to the model or a client to have a look at the shots, and also use it to focus and shoot when I’m in uncomfortable camera positions.
The Eye-Fi card, due to its limitation in size, went into my little Casio camera I tend to carry around all the time. It simply uploads its shots in a watched folder. When I get home, I don’t even need to think about taking the card out of the camera to get my shots into the computer.
About the Author: Torsten Kieslich
I’m a freelance journalist and enthusiastic hobby shooter in Neuss, a little town in Germany’s Rhineland just between Duesseldorf and Cologne. I usually write about the bits and pieces of Photoshop, Lightroom and other imaging software. You’ll find some of my articles in the German edition of Advanced Photoshop and other magazines. I’ve also been the founding editor-in-chief of the photography magazine Pictures and written some books on Lightroom. I have developed a certain liking for Las Vegas – there’s just more to it than glamour and gambling. Check out the link to my website, Faces of Vegas, below. My photography usually is focused on people, but I allow myself to get some shots of lovely hot rod and vintage cars as well.
Find Torsten: Faces of Vegas | Facebook | Facebook Page | Model Mayhem