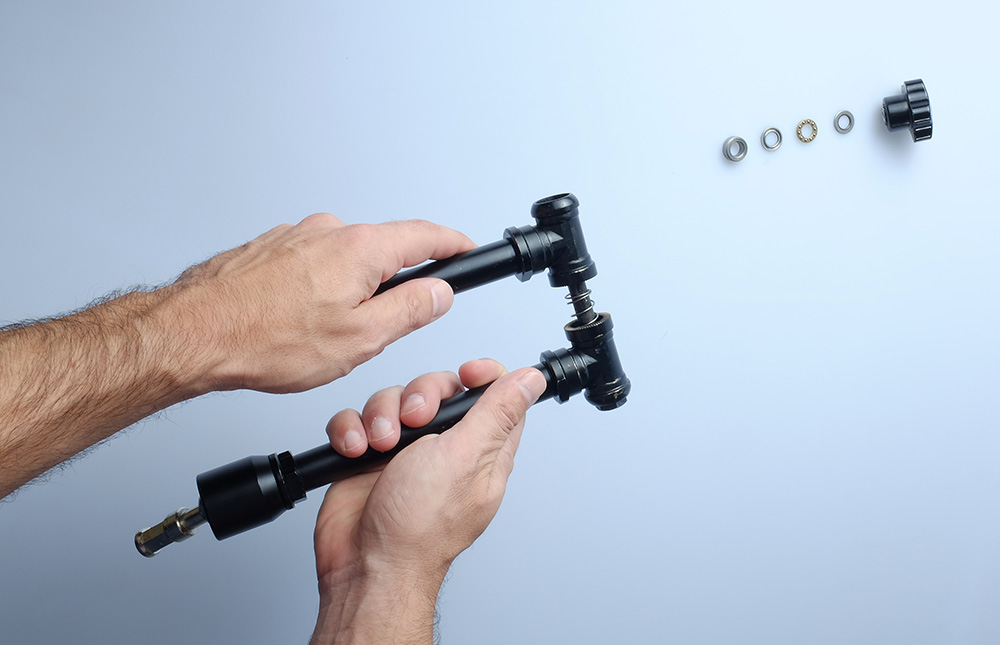
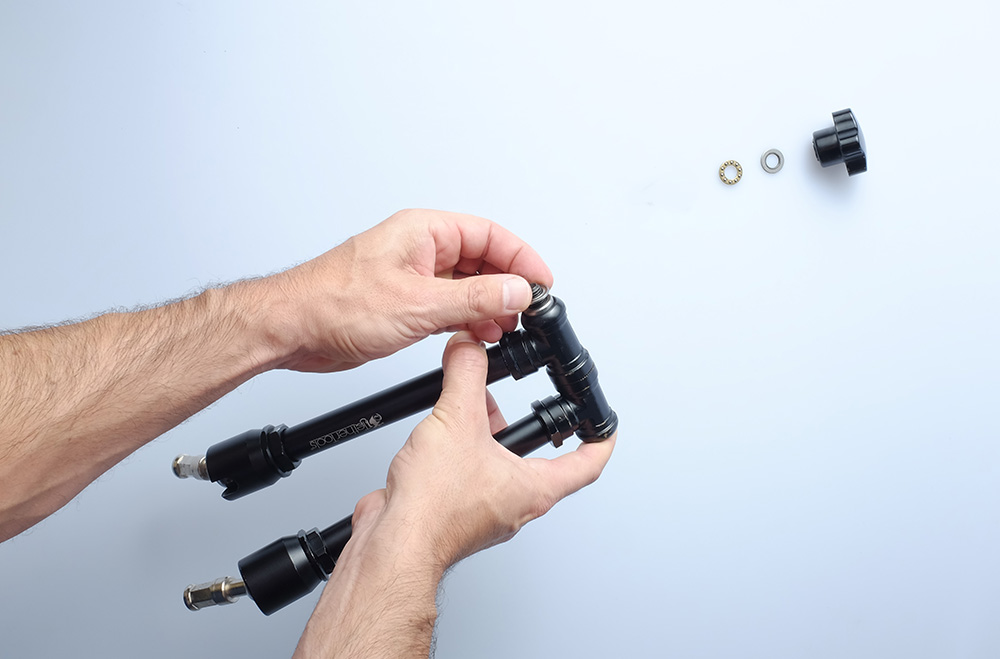
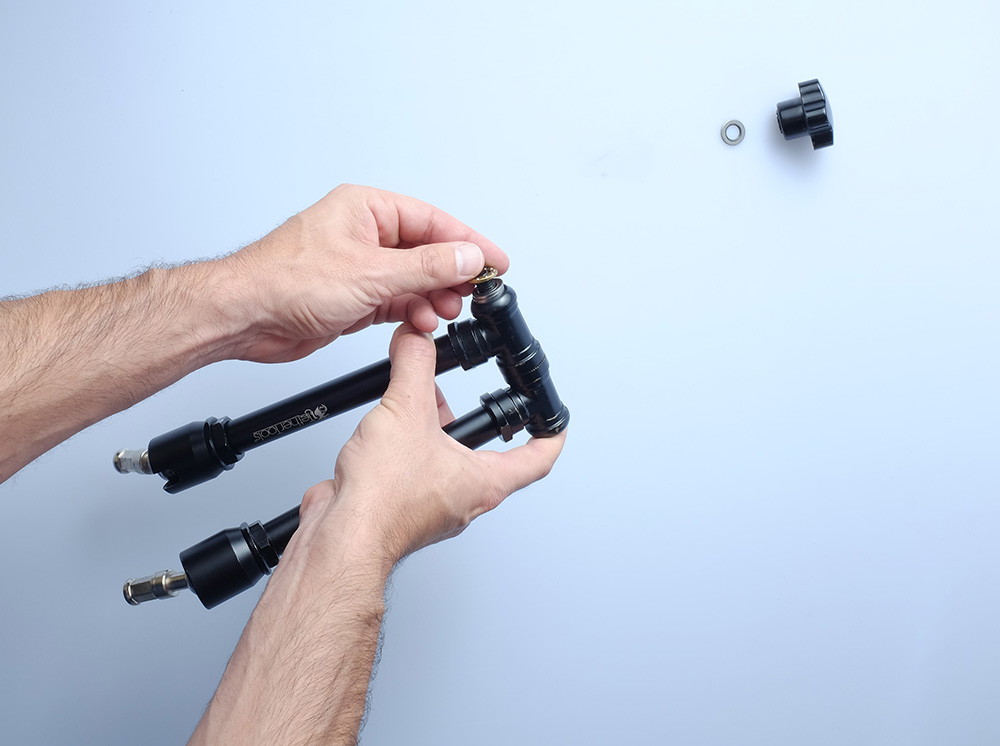
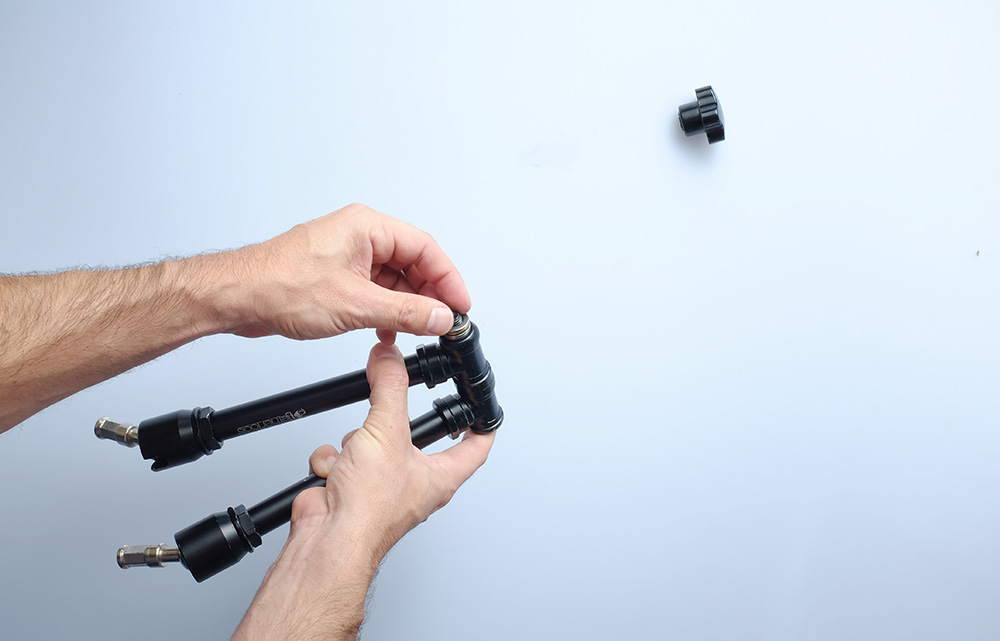
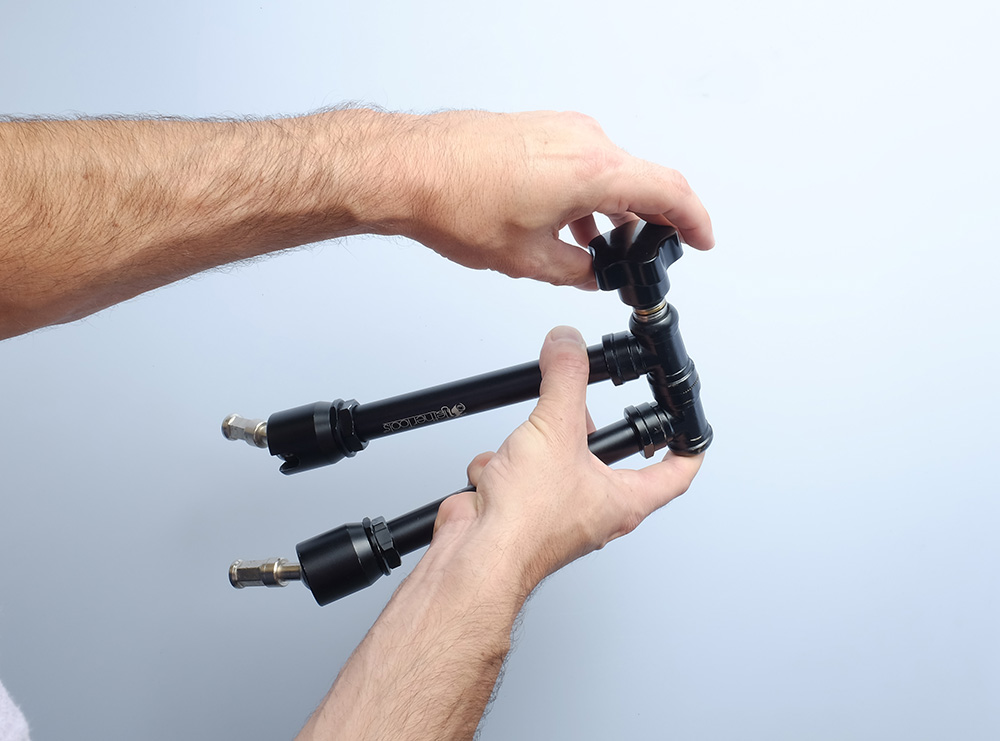
If you ever have need to reassemble the Rock Solid Master Articulating Arm, here are the step by step instructions (click on images to see them larger):


Posted by: Josh Kenzer on May 21, 2015
If you ever have need to reassemble the Rock Solid Master Articulating Arm, here are the step by step instructions (click on images to see them larger):
Send us a message and we'll be in touch with you within 1-2 business days.
You can reach us at 1 888-854-65651 888-854-6565 (Monday - Friday 9am to 5pm MST)
| Cookie | Duration | Description |
|---|---|---|
| cookielawinfo-checkbox-analytics | 11 months | This cookie is set by GDPR Cookie Consent plugin. The cookie is used to store the user consent for the cookies in the category "Analytics". |
| cookielawinfo-checkbox-functional | 11 months | The cookie is set by GDPR cookie consent to record the user consent for the cookies in the category "Functional". |
| cookielawinfo-checkbox-necessary | 11 months | This cookie is set by GDPR Cookie Consent plugin. The cookies is used to store the user consent for the cookies in the category "Necessary". |
| cookielawinfo-checkbox-others | 11 months | This cookie is set by GDPR Cookie Consent plugin. The cookie is used to store the user consent for the cookies in the category "Other. |
| cookielawinfo-checkbox-performance | 11 months | This cookie is set by GDPR Cookie Consent plugin. The cookie is used to store the user consent for the cookies in the category "Performance". |
| viewed_cookie_policy | 11 months | The cookie is set by the GDPR Cookie Consent plugin and is used to store whether or not user has consented to the use of cookies. It does not store any personal data. |